In This Article
Introduction to All Grain Brewing
Homebrewing is not exactly a pursuit for the impatient. Even once you’re set up in your garage or kitchen, there will be more issues to figure out and more troubleshooting along the way. After your first successful batch? You’ll need to replicate that and become consistent. Not to mention trying new styles of beer! Brewing beer is an ongoing exercise in refining your craft.
One of the main challenges a homebrewer faces is transitioning from extract brewing to all-grain brewing. Here’s everything you need to know:
What Is All Grain Brewing?
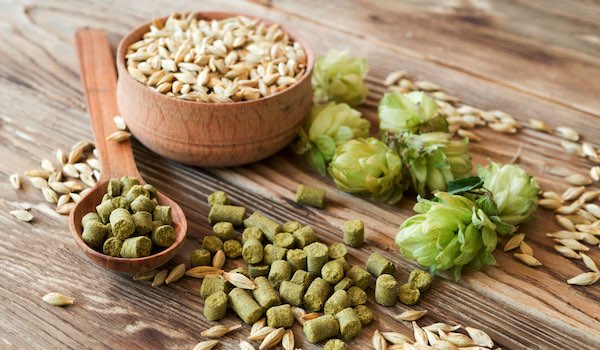
All-grain brewing is aptly-named… It means making beer entirely with malted grains (typically barley) without using malt extract. Many novice homebrewers will use malt extract as it’s easier to work with, and you won’t have to worry about milling your own grains. Simply put, that’s the only technical distinction between all-grain brewing and extract brewing, but the results can have massive differences in the beer’s flavor, body, and fermentability.
Many homebrewers will take this as a new challenge as they become more experienced. Professional brewers rarely utilize malt extract (usually in the form of a pre-made malt syrup or powder), so more advanced homebrewers find this to be a leveling up.
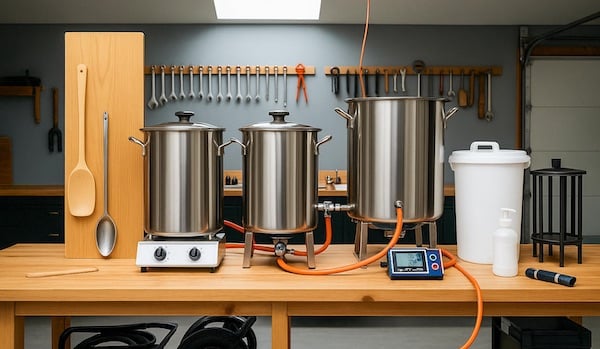
How All Grain Brewing Works
Crushing the Grains (Optional)
It is worth noting that you can purchase your grains pre-crushed from your supplier or another homebrewer. However, if you’re really trying to go analog and have access to a grain mill, have at it!
The goal is to crush the malt kernels open so that the hot strike water can dissolve the starches in the malt. With well-crushed malt, you should see no whole kernels. Make sure each kernel is broken into two to four pieces.
If you’re new to a grain mill, the “default” setting (commonly 0.045 inches) will give you a serviceable crush. It never needs to be perfect on the first go, but you’ll start to dial in your grain mill as you become more experienced.
Mashing
Mashing is the process of combining your crushed grains with strike water in the mash tun.
Water quantities will vary between 0.95 and 2.4 quarts of water per pound of grain. Mash thickness should be within the range of 1.25 and 1.375 quarts per pound. If you’re following someone else’s recipe, keep an eye on those values.
Stir occasionally with your paddle to avoid temperature stratification. You should aim for a temperature range of 146°F and 156°F for a single-step infusion mash. Enzymes and sugar conversion for specific beers are taken into account in recipes, so just be consistent.
Hold the temperature steady for 60 minutes to convert starches into sugars.
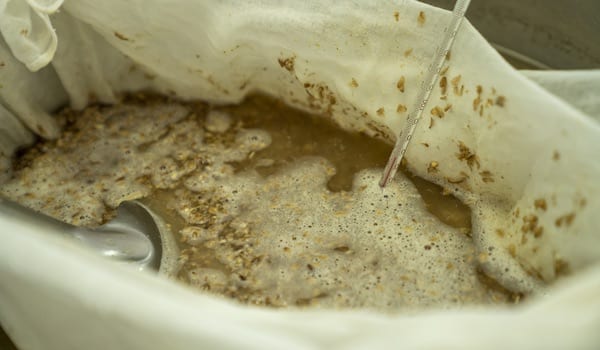
Lautering and Sparging
The next step is to separate the liquid wort from the solid grains. Lautering is essentially a filtration process where the brewer creates a filter bed at the bottom of the mash tun with the grains and then drains the wort through it into the kettle.
You’ll then sparge with hot (170°F is standard) water to rinse the remaining sugars from the grains. This can be done through batch (adding, stirring, and draining in batches) or fly sparging (continuous sprinkling).
Stop sparging once you’ve collected your pre-boil volume.
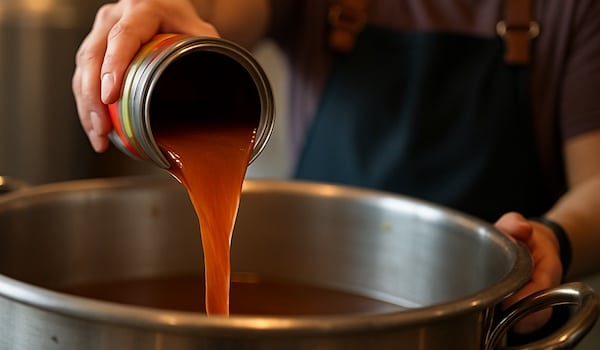
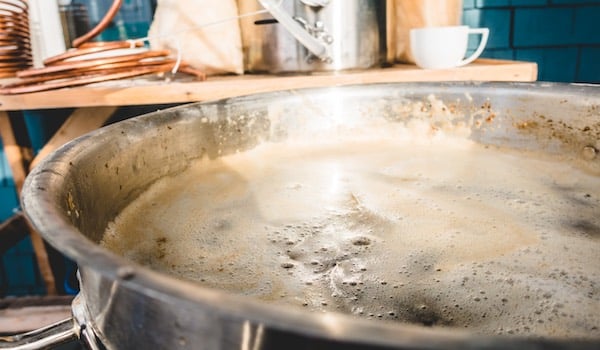
Boiling and Beyond
After the mash and lautering, the processes are basically identical for extract and all-grain brewers.
- Boiling the wort: You start by bringing the wort to a vigorous boil (typically 60 minutes) for sanitation, while also developing specific characteristics, such as flavor, aroma, and body.
- Adding hops: Add hops according to the recipe schedule. This includes bittering, flavor, and aroma additions.
- Cooling: After the prescribed boil, you’ll use a chilling unit to rapidly cool wort to 65–75°F.
- Transfer and Pitch Yeast: Either by siphoning or pouring, transfer the cooled wort into a fermentation vessel. You should aerate the wort by moving the fluid around before pitching (adding) the yeast.
- Fermentation: Once pitched, the yeast will begin its work in the sealed fermenter. Make sure to use an airlock and follow the recipe’s recommended temperature for 1–2 weeks.
- Package: Once the beer is fermented and you’ve checked the gravity, you can bottle or keg the beer to enjoy.
All Grain vs Extract Brewing
| Feature | All Grain Brewing | Extract Brewing |
|---|---|---|
| Time Required | Longer (4–6 hrs) | Shorter (1–2 hrs) |
| Control | Full control | Limited control |
| Cost | Higher upfront | Lower upfront |
| Flavor | Often better | Still very good |
Why Brew All Grain? Pros and Cons
Advantages of All-Grain Brewing
- Complete control of the brewing process: You can control mash temperature, water chemistry, and the quality of the grain bill. This allows for precise tuning of flavor, color, and body. It’s a double-edged sword as it also leaves the door open for mistakes…
- Flexible recipe building: You’re not limited by available malt extracts, as there’s a wider variety of specialty malts available with brewing shops and online retailers.
- Potential for deeper or better flavors: Assuming the rest of the process goes according to plan, using freshly mashed grains often produces cleaner, richer, and more nuanced flavors than extract.
- It’s more authentic: This process mirrors the methods of professional breweries and reflects brewing traditions. Pouring bags of grain just feels more like brewing!
- Cost-effective (long term): Buying grain in bulk is cheaper than malt extract over time, especially if you’re a committed homebrewer.
Disadvantages of All-Grain Brewing
- A more time-consuming process: An all-grain brew day typically takes 6–8 hours, whereas extract brewing only takes 3–4 hours.
- Requires additional equipment: You’ll need a mash tun, sparging system, and often a larger kettle for all-grain brewing. Therefore, there are either higher startup costs or additional investment required when brewers upgrade to all-grain brewing.
- A steeper learning curve: Understanding mash chemistry, pH, and temperature control is particularly important in all-grain brewing. There’s also a higher margin for error.
- Less convenient: For brewers with limited resources, the added time and equipment for all-grain brewing can be burdensome.
- Inconsistent results: Batch variability is a common issue in homebrewing, and all-grain processes are particularly prone to errors in temperature or water-to-grain ratios.
Tips for Getting Started with All-Grain Brewing
While transitioning from extract to all-grain brewing may seem daunting at first, it’s a worthwhile challenge. Luckily, there are mini-steps and other options to make it a little easier.
Trying brew-in-a-bag (BIAB) mashing is a way to ease yourself in, while there are plenty of resources for joining a homebrew club. Shadowing a more experienced homebrewer or even asking a local craft brewer are other ways to gain more insight before you commit to all-grain brewing.
A Practical Starting Point Before Going All-Grain
All-grain brewing can be a rewarding upgrade, but it’s also where equipment, time, and cost start to add up quickly. If you’re currently brewing with extract—or still deciding how far you want to take the hobby—it often makes sense to start with a simpler setup and build from there.
Many brewers ease into all-grain by starting with a solid beginner kit, learning the fundamentals, and then transitioning to methods like brew-in-a-bag (BIAB) before committing to a full all-grain system.
If you’re weighing your options, our guide to the Best Home Brew Kits for Beginners breaks down starter kits that work well for extract brewing and explains which ones can grow with you as you move toward all-grain.
Wrapping It Up
If you’ve been brewing with extract and feel ready to take the next step, all-grain brewing is a great way to level up. It gives you more control, lets you tweak recipes in new ways, and often leads to better-tasting beer.
It does take more time and equipment, and there’s a bit more to learn. But once you get the hang of it, the process starts to feel more natural—and more rewarding.
You don’t have to jump all in straight away. Start with a simpler method like brew-in-a-bag, or watch how someone else does it first.
At the end of the day, it’s about making craft beer you enjoy and learning a few new skills along the way.
Think you’re ready to give it a go?