
Some links may be affiliate links. We may earn a commission at no extra cost to you, which helps support the site.
In This Article
Introduction to Extract Brewing
Homebrewing is like anything else: you have to start somewhere. For most, this won’t mean a massive brewhouse with all the bells and whistles. No matter how into brewing you are, it’s silly to dive in with the Rolls-Royce of gear when you’re first starting out. For homebrewers, those early brews typically involve the use of malt extract rather than an all-grain approach.
This alternative method is a favorite for beginners and makes the learning curve less steep. It’s certainly more convenient, but most experienced homebrewers and all professionals argue that you leave flavors and aromas on the table when you go the easier route. It’s still a worthwhile way for a beginner to dip their toes in the wort…
Not sure which kit to start with? Our guide to the Best Home Brew Kits for Beginners breaks down the top starter options, what’s included, and which kits offer the best value.
What Is Malt Extract?
Malt extract is used as a sugar source in brewing. It is essentially a concentrated form of wort, which is unfermented beer normally made from the mash in an all-grain brewing process. Malt extract is produced by mashing malted grains, then removing most of the water to create either a powder (Dry Malt Extract or “DME”) or a thick syrup (Liquid Malt Extract or “LME”). These are sold at any store that sells brewing gear or supplies.
Using malt extract simplifies brewing by eliminating the need for a mashing step. This way, you’ll get to focus on boiling, hop additions, and fermentation. Mashing, an all-grain brewing method, provides value and isn’t exactly rocket science. It does, however, require additional time and equipment. Instead of milling (crushing) the malt grain and combining it with hot water to make a mash, brewers will use an extract that contains the fermentable sugars and malt flavor. This eliminates the need for a mash entirely.
Easiest Way to Get Started
Once you understand the basics of extract brewing, the next question is usually simple: what do I actually need to buy? Starter kits exist to strip the process back to the essentials and make your first brew day easier.
The right starter kit for you really comes down to a few practical factors: how much space you have to work with, how much beer you’re looking to brew at a time, and how much you want to spend getting started.
If you’re looking for a straightforward way in, here are a few solid beginner-friendly options worth considering:
- The Northern Brewer – Brew. Share. Enjoy. Kit
- The Mr. Beer – Craft Beer Kit
- The BrewDemon – Premium Kit
Each of these kits takes a slightly different approach, depending on batch size, space requirements, and upgrade potential.
Or, if you want a full breakdown, check out our guide to the Best Home Brew Kits for Beginners, where we compare each of these kits in detail and explain what’s included, who they’re best for, and which options offer the best overall value.
Liquid Malt Extract (LME)
The liquid version of malt extract comes in a thick, syrupy concentrate. It’s made by mashing malted barley to create a wort, then evaporating most of the water to thicken and make it syrupy.
The makeup of different brands varies, but the syrup typically contains around 20% water and will appear golden to dark amber.
Pros of LME:
- Using LME saves time and enables a brewer to operate with fewer pieces of equipment. The results are fairly consistent, provided that correct usage is followed. LME brands are widely available and can be shipped from online retailers.
Cons of LME:
- Brewers will have less control over fermentability and flavor. Liquids also have a shorter shelf life than dry malt extract or grains. They’re slightly heavier and messier to handle than dry extract.
- First, heat the water in your kettle to approximately 150°F–160°F (65°C–71°C). Remove the kettle from the heat and slowly stir in the LME until the syrup is fully dissolved. Return to a boil and go through your hop additions, fermentation, and other steps.
Dry Malt Extract (DME)
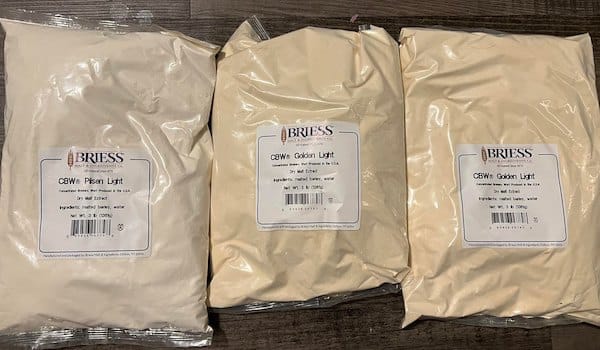
DME is a wort with nearly all the moisture removed. It comes in a powder form and is usually packed in a bag or a tub.
Pros of DME:
- Because of its powder form, it’s easy to quantify the amount of DME through measuring cups or tools. DME is also more shelf-stable than LME.
Cons of DME:
- Unlike liquid malt extract, DME is never hop-flavored because hop compounds cannot survive the drying process.
- DME powder simply needs to be mixed with water to rehydrate it. The DME-to-water ratio depends on the desired wort gravity and will be detailed in the recipe. Once combined with water and reconstituted, the wort solution can go through the rest of the standard brewing process.
LME vs DME Comparison
| Feature | Liquid Malt Extract (LME) | Dry Malt Extract (DME) |
|---|---|---|
| Form | Thick syrup | Fine powder |
| Water Content | ~20% | ~2% |
| Shelf Life | Shorter (prone to oxidation) | Longer (more stable) |
| Ease of Use | Easy to pour, but can be sticky and messy | Lighter, dissolves quickly |
| Measurement Accuracy | Slightly harder to measure precisely | Easy to measure by weight |
| Storage | Should be refrigerated after opening | Store in an airtight container in a dry place |
| Flavor Impact | Can darken beer more due to caramelization risk | Lighter in color, more consistent |
| Typical Uses | Popular in beginner extract kits | Used for precise adjustments or yeast starters |
Extract Brewing Process
It’s essential to follow a recipe precisely, including the type of extract specified and the correct method for its introduction.
1. Heat Water
- Add 2–3 gallons of water to your kettle, depending on the batch size.
- Start heating to about 150–160°F.
- Use a thermometer to monitor the water temperature.
2. (Optional) Steep Specialty Grains
- Even some recipes will include specialty grains, such as crystal or chocolate malt, that will supplement the extract.
- Place the grains in a mesh bag and steep for 20–30 minutes.
- Remove the bag from the kettle and discard the grains once steeping is done.
3. Add Malt Extract
- Remove the kettle from the heat (this prevents the malt from scorching).
- Prepare the package for easy extract pouring.
- Stir in the syrup or liquid (LME) extract or dry malt extract (DME) until fully dissolved. Go slowly while stirring.
- Return the kettle to heat.
- From here on out, everything will be identical to all-grain brewing.
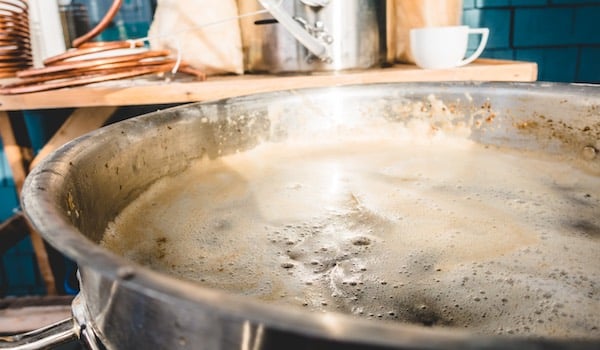
4. Bring to a Boil
- Once dissolved, bring to a rolling boil.
- Watch for boil-overs, especially in the first 10 minutes.
5. Add Hops
Now the fun begins! Strictly follow your recipe’s schedule for hop additions:
- Bittering hops (start of boil)
- Flavor hops (15–30 mins before end)
- Aroma hops (last 0–5 minutes or flameout)
6. Cool the Wort
- Use a wort chiller or an ice bath to rapidly cool the wort to 65–75°F, thereby reducing the risk of contamination and achieving a better flavor profile.
- Use a thermometer to make sure you get the temperature down.
7. Transfer to Fermenter
- Once cooled, pour the wort into a sanitized fermenter.
- Add additional (cool and clean) water to reach the final volume (prescribed in the recipe).
- Aerate the wort by shaking or stirring vigorously.
8. Pitch Yeast
- Depending on the recipe, sprinkle dry yeast directly or rehydrate it according to the instructions.
- Seal the fermenter with an airlock and store it in a cool, dark place.
9. Ferment
- Primary fermentation typically takes 1 to 2 weeks.
- Check the temp to ensure it’s between 65–72°F.
- Check the gravity with a hydrometer to confirm fermentation is complete. You’ll need a stable gravity reading over 2–3 days.
10. Package
- Sanitize all bottles, kegs, cans, and tools before packaging.
- For bottling, mix in priming sugar (to carbonate) and bottle your beer, and let it condition at room temperature for 2–3 weeks.
Pros and Cons of Extract Brewing
There are plenty of pros and cons. We’ve already gone over, but here’s a quick rundown for when you’re making a decision:
Benefits of Extract Brewing
- Short brew day
- Less equipment than all-grain brewing
- Smaller margin of error
- Easy to learn
- Great intro to homebrewing
Drawbacks
- Less control and consistency
- Slightly less fresh flavor
- You can’t experiment with different grains
- Higher per-batch cost
Quick Tips for Better Extract Brewing
- Use fresh extract and ALWAYS follow usage guidelines on the extract package.
- Boil with care to avoid scorching.
- Use steeping grains for added flavor complexity (you can buy these anywhere you procure your extract).
- Choose your fermentation location wisely!
- Sanitize everything thoroughly (this goes for all-grain brewing, as well).
- Stick to the recipe!
Is Extract Brewing Right for You?
For those early brew days, using malt extract can be a lifesaver. The brewing process can be overwhelming, and most people don’t have an entire garage to dedicate to a new hobby… So if you’re starting out and feel self-conscious about using extracts in your brewing process, just know that almost everyone starts there. Beer and brewing are about fun. And if the beer tastes great, there’s no reason to rock the boat unless you’re up for a new challenge!


I just like the helpful information you provide in your articles
Thank you for the feedback!