In This Article
Introduction to Cloudy Beer
So you’ve gone through the entire brewing process, and your moment of triumph has finally arrived: you get to try your newest beer. If you’re expecting a clear IPA or lager and find it to be slightly hazy or cloudy, this can be alarming.
While hazy IPAs are all the rage these days, that doesn’t make cloudiness ideal when you’re brewing a traditional West Coast IPA, golden ale, or lager. It doesn’t necessarily mean you have to dump the batch, either. It’s all about pinpointing the cause, identifying a solution, and learning from it for future batches.
But what causes cloudiness? And how can it be prevented? We’ll take a deep dive into which beers benefit from a bit of haze and which ones do not.
RELATED ARTICLES:
How Do You Fix a Stuck Fermentation? Expert Tips!
Why Does My Beer Taste Off? Guide to Beer Off Flavors
What Is Cloudy Beer?
Visual Signs of Cloudiness
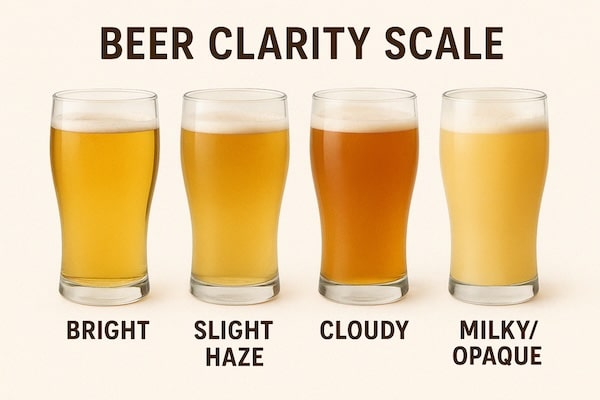
Essentially, any condition that gets in the way of a clear beer that you can normally see through would be considered cloudy or hazy. “Cloudy” or “hazy” beer will look different depending on the scenario. You may notice cloudiness immediately after fermentation or bottle conditioning. There can be anything from a slight haze to even a milky appearance.
Noticeable turbidity, where you can easily perceive particles suspended in the beer, is the easiest to identify. Other beers will range from a slight haze (with some landscaping through the fluid) to fully murky.
Keep in mind that this will only apply to beer styles that can be clear. Darker beer styles, such as porter, stout, schwarzbier, or black IPA, are opaque, and you won’t be able to tell the difference if there are unintentional conditions that cause a beer to be cloudy.
Is Cloudy Beer Always a Problem?
It has to be stated that cloudiness isn’t always a bad thing, especially considering the rise of New England IPA, where dry-hopping causes the beer to be opaque or even milky in appearance. Even hoppy lagers and pale ales now commonly have a bit of haze to them. But for the most part, you should be able to discern whether an unintentional cloudiness or intended haziness exists in a beer.
Common Causes of Cloudy Beer
| Cause | Signs | Possible Fix |
|---|---|---|
| Yeast in suspension | Murky or powdery look, often early on | Allow more conditioning, cold crash |
| Protein haze (chill haze) | Appears when cold, clears when warm | Improve boil, chilling, mashing, and racking |
| Incomplete fermentation | Cloudiness with off flavors | Confirm FG, extend fermentation, cold crash |
| Infection | Cloudiness + sour/off flavors | Sanitation, dump batch if confirmed |
| Grain/adjuncts (wheat, oats) | Consistent haze, thicker body | Accept if style-appropriate; reduce in clear beers |
| Poor brewing practices | Chill haze, sediment, starch haze | Improve boil, chilling, mashing, racking |
Yeast in Suspension
The primary cause of unintentional haze is yeast remaining in suspension in the beer if it hasn’t had enough time to flocculate and settle at the bottom. The cloudiness should improve over time, so it’s essential to incorporate best practices such as cold crashing and allowing sufficient time for proper fermentation and conditioning. Patience is key!
Protein Haze (Chill Haze)
This temporary cloudiness appears when the beer is chilled but disappears when it warms up. Chill haze is caused by the interaction of proteins and polyphenols (tannins) from the malt and hops. These form loose, reversible clumps in the beer and are more visible at colder temperatures.
As temperatures rise, the bonds between the proteins and polyphenols break down and the particles dissolve again, breaking up the chill haze for a clear beer. There’s no negative flavor impact, and chill haze is generally considered a benign issue. You just want to make sure cloudiness is from chill haze before investigating further or (even worse) dumping a batch!
Incomplete Fermentation or Infection
There are many signs of infection, including cloudiness. Check for off flavors and don’t strictly rely on the cloudy appearance to diagnose issues. Haze can also be a sign that fermentation hasn’t been complete, which is prevented by cold crashing across a few days.
Grain and Adjuncts (e.g., Wheat, Oats)
Certain grains like wheat and oats add proteins that naturally cause haze. This is fine if it fits the intended style, but you should be wary of adding too much of these ingredients to the malt bill of recipes that aren’t compatible with them.
Poor Brewing Practices
Cloudiness can also be the result of technique-related missteps:
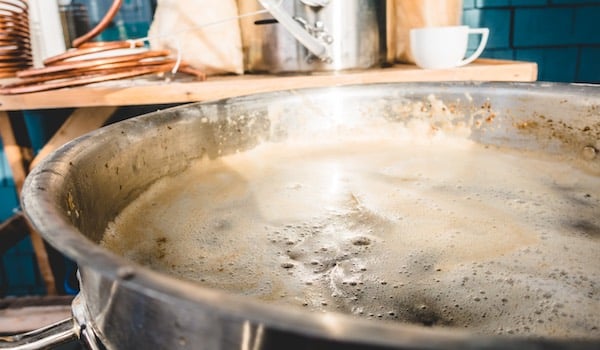
- Inadequate boils: Shorter boils can fail to sufficiently coagulate proteins (a “hot break”), which can lead to cloudiness and chill haze later on. Not chilling rapidly enough can also lead to this.
- No cold crashing: Cooling the beer after fermentation encourages hop matter, proteins, and yeast particles to drop out. This should be done by bringing the beer down to near-freezing temperatures for at least 2 days before packaging.
- Not using Irish moss or Whirlfloc: Skipping the addition of fining agents post-fermentation will allow particles to remain suspended in the beer.
- Bad racking technique: If you transfer the beer to packaging before yeast and sediment have time to settle, it will lead to cloudiness. Confirm fermentation is complete and allow more time for the beer to clarify naturally.
- Poor lautering and sparging: Rushing the sparging process allows excess particles (“grain dust”) into the boil.
- Poor mashing: Inconsistent mash temperatures and pH levels can leave residual starches in the wort, resulting in haze later.
How to Fix Cloudy Beer
Let It Condition Longer
Time often helps particles drop out of suspension, which will result in more clarity in the beer. Bottle-conditioning will allow the haze to dissipate, and extended primary fermentation will reduce yeast particles. One of the most reliable techniques for achieving clearer beer is cold crashing.
Cold Crash Your Beer
Cold crashing is one of the best tools for clarity, but it must be done carefully:
- Ferment until complete: Confirm fermentation is finished before cold crashing. Check final gravity (FG) over several days to ensure stability. After crashing, make sure proper carbonation is still achieved.
- Lower the temperature: Gradually drop the beer to 32–40°F (0–4°C) over 2–3 days. Avoid shocking the yeast.
- Allow the sediment to drop out: Leave the beer at crash temps for 2–7 days, with at least 48 hours for particles to settle.
Use Fining Agents
A variety of fining agents can help with clarity:
| Fining Agent | When to Add | What It Targets |
|---|---|---|
| Irish Moss | During the boil | Proteins (hot break) |
| Whirlfloc | During the boil (end) | Proteins and haze-forming compounds |
| Gelatin | Post-fermentation | Proteins and polyphenols |
| Biofine | Post-fermentation | Yeast and haze particles |
Filter the Beer
Filtering physically removes haze-causing particles like yeast and proteins. Methods include plate or frame filters, canister filters, sheet or bag filters, and even Diatomaceous Earth (DE) powder. For professional brewers, filtration also improves consistency and shelf life.
When It’s Okay to Leave It Cloudy (Hazy)
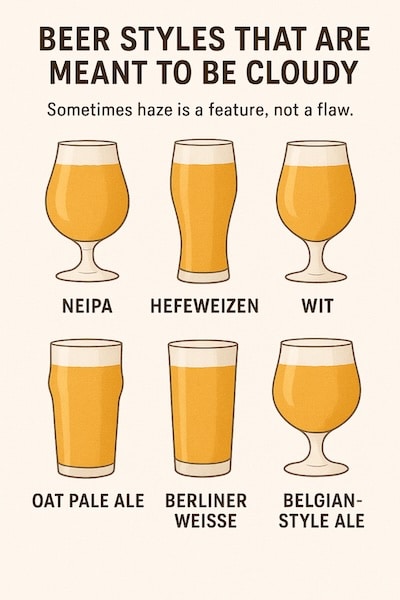
Beer Styles That Are Supposed to Be Hazy
Some beers are meant to be hazy and look great that way:
| Beer Style | Why It’s Hazy |
|---|---|
| NEIPA | Heavy dry-hopping, high protein grains |
| Hefeweizen | Yeast in suspension, wheat proteins |
| Belgian Wit | Wheat and spices create turbidity |
| Hoppy lagers (West Coast Pils) | Dry-hopping haze |
| Oat Pale Ales | Oats contribute protein haze |
It Tastes Fine, So It Is Fine
If the beer tastes great and is safe for consumption, some slight cloudiness shouldn’t be a dealbreaker. When you’re first starting, you can’t get bogged down in every little imperfection. If you encounter a cloudy batch, identify the reason and learn from it.
Preventing Cloudy Beer in the Future
The best cure is prevention. To keep your beer clear, follow these best practices:
- Use fining agents like Irish Moss or Whirlfloc
- Ferment fully and give the beer time to clarify naturally
- Cold crash before bottling
- Minimize splashing when transferring
- Practice proper sanitation to avoid infection
- Avoid excessive wheat or oats unless the style calls for it
- Ensure a strong boil with a hot break
- Chill the wort quickly and thoroughly
- Prevent oxygen exposure post-fermentation
- Rack carefully to avoid stirring up sediment
While haze has become increasingly desirable in beer over the past few years, there’s no reason to settle for unintended cloudiness. Luckily, there are a few best practices to incorporate into your brewing operation to keep things crisp and clear (when you want them to be).
What Do You Think?
Want more brewing troubleshooting tips? Sign up for our Homebrew Help newsletter below or grab our free beer clarity checklist for your next brew day. Got a new brew or favorite beer you want to share? Tag us @craftbeermenow on Instagram to be featured.
Sign Up for Our Newsletter Here!